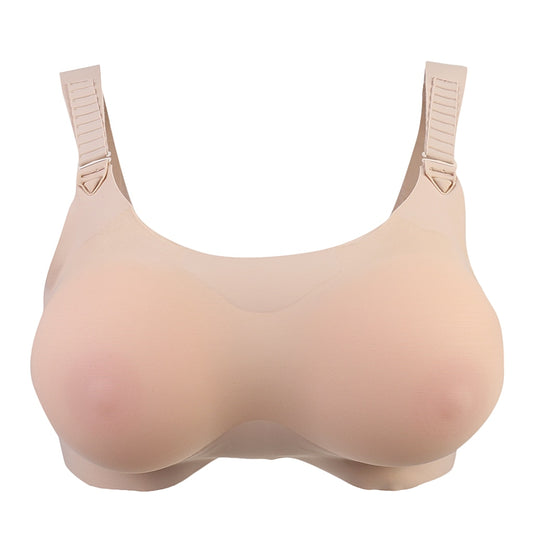

Adhesive breast forms offer something no pocket bra can: a completely seamless look under backless gowns, strapless costumes, and sheer tops with no visible straps or bra lines. When applied correctly, they stay put through dancing, vogueing, and hours of performance. When applied incorrectly, they slip, irritate skin, or leave residue that's a nightmare to remove.
This guide covers everything you need to know — prep, application technique, sweatproof strategies, removal, and skin care. For the full context on breast form types, sizing, and wearing methods, see our Complete Guide to Non-Medical Breast Forms.
What Are Adhesive Breast Forms?
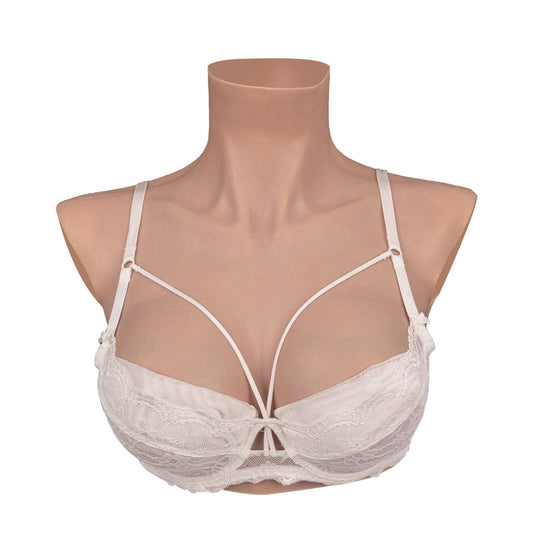
Adhesive breast forms are silicone forms designed to attach directly to the chest using medical-grade adhesive — either a pre-applied backing on the form itself, or a separately applied adhesive. They create a bra-free look that's impossible to achieve with a pocket bra.
They're ideal for:
- Backless gowns and halter tops where a bra strap would show
- Strapless costumes and swimwear
- Sheer or mesh tops where a bra would be visible
- Performers who want maximum security without visible support
Important: All breast forms at The Drag Queen Store are for drag, crossdressing, cosplay, and gender expression — not medical or post-mastectomy use.
Choosing the Right Adhesive
Not all adhesives are equal. The two main options:
Pre-Applied Adhesive Backing
Some forms come with a self-adhesive backing already applied. Convenient, but the adhesive strength is typically lower than separately applied medical-grade adhesive — and it degrades with each use. Good for light activity; not reliable for high-energy performance.
Separately Applied Medical-Grade Adhesive
The professional standard. Applied in thin coats to the back of the form before pressing to the chest. Significantly stronger hold, sweat-resistant when applied correctly, and reusable across many applications. This is what working drag performers use.
Skin Sensitivity
If you have sensitive skin, test any adhesive on a small area of your inner arm 24 hours before full application. Look for hypoallergenic formulas. Give your skin rest days between adhesive applications — daily use without breaks can cause irritation even with gentle adhesives.
Step-by-Step Application
What You'll Need
- Medical-grade breast form adhesive
- Isopropyl alcohol (70%+) and cotton pads
- Translucent setting powder and a brush
- A mirror (ideally full-length)
- Adhesive remover or baby oil (for removal later)
Step 1: Skin Prep (Critical)
This is the step most people rush — and it's why forms slip. Clean the entire chest area with isopropyl alcohol on a cotton pad. Remove all traces of moisturizer, body lotion, sweat, and oils. Allow to dry completely — at least 2 minutes. Do not touch the area after cleaning.
Pro tip: Apply antiperspirant to the chest area the night before a performance. This significantly reduces sweating under the forms during the show without affecting adhesive performance.
Step 2: First Thin Coat
Apply a thin, even layer of adhesive to the back of the form — not to your skin. The coat should be thin enough that you can still see the silicone surface through it. Allow to become tacky: 30–60 seconds depending on the adhesive and humidity. It should feel sticky to a light touch but not wet.
Step 3: Second Thin Coat
Apply a second thin coat over the first. Allow to become tacky again. Two thin coats create a much stronger bond than one thick coat — the chemistry of contact adhesives requires this. Never skip the second coat for performance use.
Step 4: Positioning
Before pressing the form to your chest, decide on placement. Stand in front of a mirror and hold the form against your chest to check position — once it makes contact, repositioning is difficult. For natural placement, the widest part of the form should sit at the outer chest. For more cleavage, position forms closer to the center.
Step 5: Press and Bond
Press the form firmly against your chest, starting from the center of the form and working outward to eliminate air pockets. Hold firm pressure for 30–60 seconds. The bond strengthens over the next few minutes as the adhesive fully cures.
Step 6: Edge Sealing (Sweatproof Technique)
Once the form is bonded, dust a light layer of translucent setting powder around the edges where the form meets your skin. This absorbs moisture and prevents sweat from working under the edge — the most common cause of slippage during performance. Reapply powder to the edges during intermission if you're in a hot venue.
Sweatproof Strategies for Performance
Heat and sweat are the enemies of adhesive hold. For high-energy performances in hot venues:
- Antiperspirant the night before: Apply to the chest area (not the form) the evening before the show. This is more effective than applying the morning of.
- Apply forms as late as possible: The longer forms are on before you perform, the more heat and sweat accumulate. Apply backstage, not at home.
- Powder the edges: As described above — do this every time, not just when you're worried about sweating.
- Avoid heavy moisturizers before the show: Even if you cleaned with alcohol, moisturizer applied to other areas can migrate to the chest. Keep the chest area dry and product-free on show day.
- Consider a backup: For very long shows (3+ hours) in hot venues, wear a light pocket bra over the adhered forms as a backup. The bra provides secondary support if the adhesive weakens.
Removal: The Right Way
Incorrect removal is the most common cause of skin irritation and form damage. Never pull forms off dry.
- Apply adhesive remover or baby oil generously around the edges of the form where it meets your skin.
- Allow 1–2 minutes for the remover to work under the edge and begin breaking down the adhesive bond.
- Gently lift the edge of the form and apply more remover underneath as you go.
- Peel slowly from the edge inward — never from the center outward.
- If you feel resistance, apply more remover and wait. Do not force it.
After removal, clean any adhesive residue from the back of the form with adhesive remover on a cotton pad. Clean your skin with mild soap and warm water. Allow your skin to breathe — avoid re-applying adhesive for at least a few hours.
Skin Care After Adhesive Use
Regular adhesive use requires a skin care routine to prevent irritation:
- Moisturize after removal: Apply a gentle, fragrance-free moisturizer to the chest area after cleaning. Adhesive and remover can be drying.
- Rest days: Give your skin at least one adhesive-free day between applications. Daily use without breaks leads to cumulative irritation.
- Watch for reactions: Redness that fades within an hour is normal. Persistent redness, itching, or rash indicates sensitivity — switch to a hypoallergenic adhesive or take a longer break.
- Avoid broken skin: Never apply adhesive over cuts, abrasions, sunburn, or irritated skin.
Caring for Adhesive Forms
After each use, clean the back of the form thoroughly to remove all adhesive residue — residue buildup reduces future adhesive performance. Use dedicated adhesive remover on a cotton pad, applied gently. Then wash the form with mild soap and lukewarm water, pat dry, and dust with talcum powder before storing.
Store forms in their original box or a soft pouch, away from heat and direct sunlight. Never stack forms without padding between them.
Troubleshooting
| Problem | Cause | Fix |
|---|---|---|
| Forms slipping during performance | Insufficient prep, single coat, sweat | Two thin coats, antiperspirant night before, powder edges, backup pocket bra |
| Forms won't bond | Skin not clean, adhesive too old, humidity | Re-clean with alcohol, use fresh adhesive, apply in a cooler environment |
| Skin irritation after removal | Adhesive sensitivity, forced removal | Use hypoallergenic adhesive, always use remover, give skin rest days |
| Adhesive residue on form | Incomplete cleaning after use | Clean with adhesive remover after every use before storing |
| Visible edges under costume | Skin tone mismatch, no blending | Body paint edges, use sheer/fishnet overlay, choose forms closer to skin tone |
When Adhesive Isn't the Right Choice
Adhesive forms are not always the best option. Consider a pocket bra instead when:
- You're performing in a very hot venue for 3+ hours — adhesive weakens significantly with heavy sweating
- You're wearing G cup or larger forms — the weight requires the additional support of a bra band
- You need to change costumes quickly backstage — pocket bras allow fast removal and repositioning
- You have sensitive skin that reacts to adhesive
For most performances, the best approach is both: adhere the forms for security, then wear a light pocket bra or corset over them for backup support and edge concealment.
Shop Breast Forms
Browse our full collection — all sizes from A to S cup, in silicone, breastplate, and suit styles:
For the complete guide to breast forms including sizing, types, performance tips, and care, read our Complete Breast Forms Guide.